An Essential Guide to Adding a Walk-In Pantry to Your Kitchen
Add a Walk-In Pantry to Your Kitchen With a Plan That Works
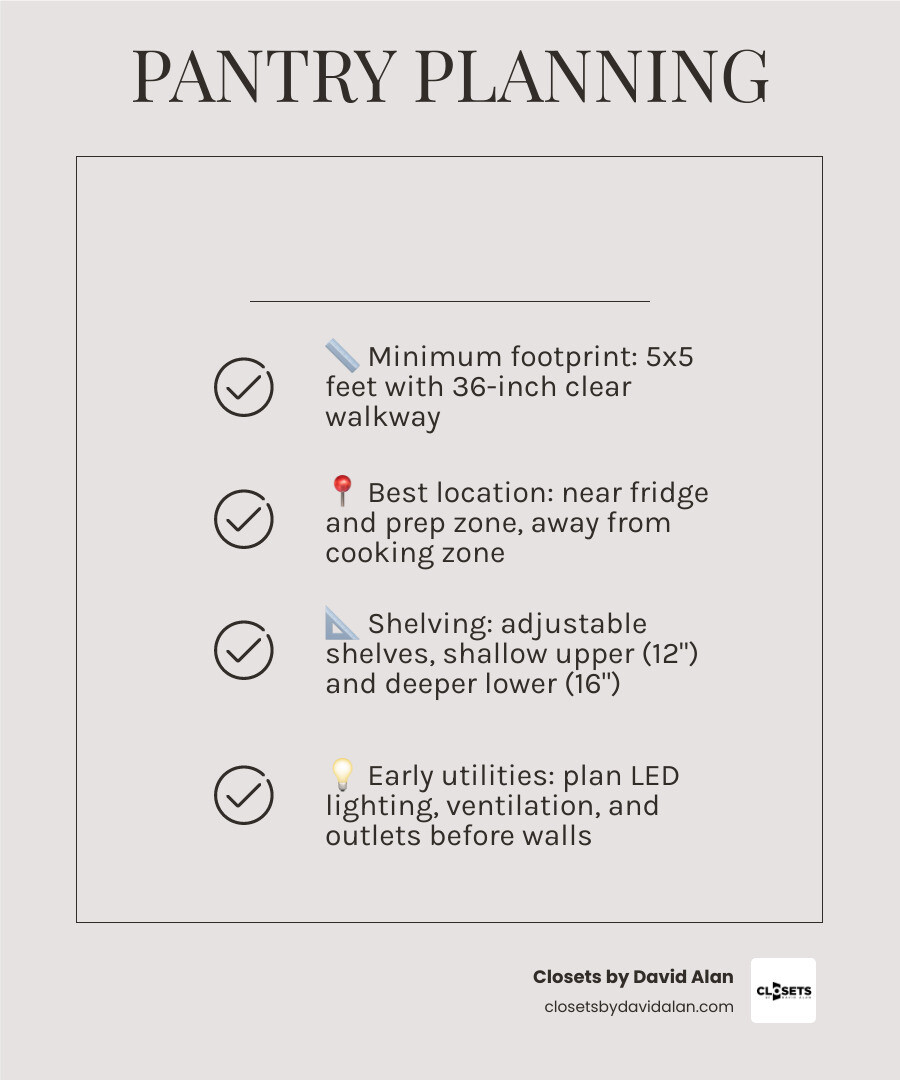
To add a walk-in pantry to your kitchen, start by claiming space close to the prep area, then plan storage around a clear aisle. A functional compact pantry can begin at about 5 by 5 feet , with a 36-inch clear walkway for one person. If two people will use it often, plan for a wider aisle.
Before building, confirm these essentials:
- Choose the right footprint. An adjacent closet, underused kitchen corner, former built-in, or nearby mudroom can be a strong candidate.
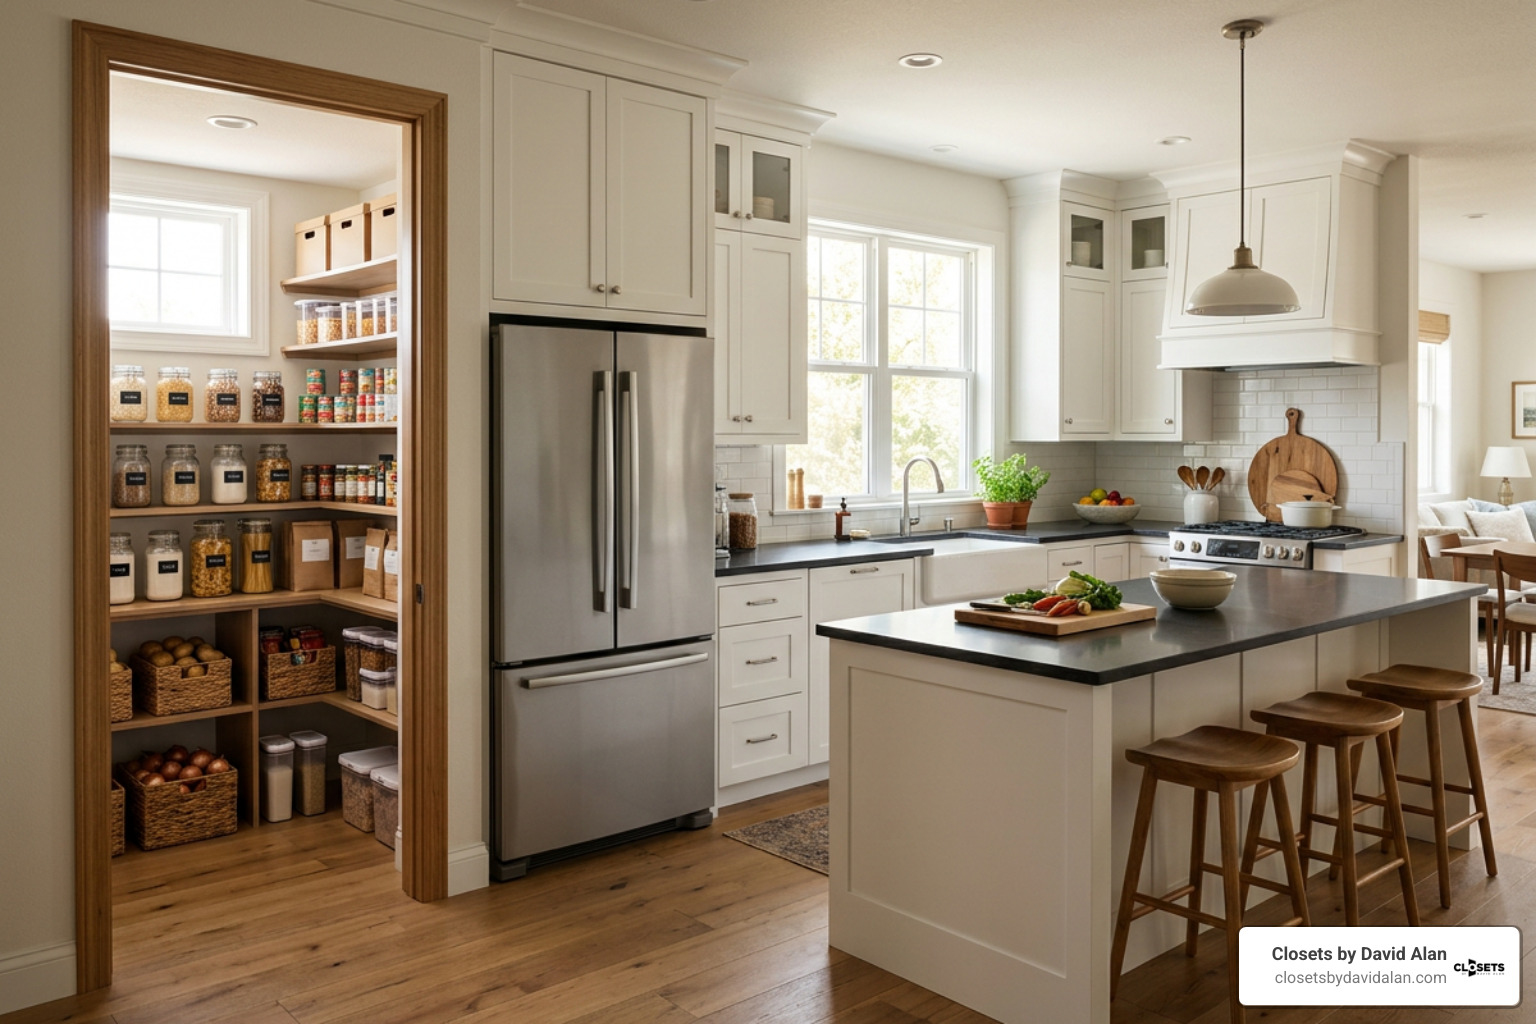
- Protect kitchen flow. Place the pantry near the refrigerator and primary prep counter, without forcing people to cross the cooking zone.
- Design shelves for real items. Use adjustable shelves, shallow shelves for everyday food, and deeper lower storage for bulk goods and appliances.
- Plan utilities early. Add layered LED lighting, consider ventilation, and rough in outlets before walls and cabinetry are finished.
A great pantry is not simply a room filled with shelves. It should reduce countertop clutter, keep everyday ingredients easy to see, and give larger items a defined home. With thoughtful placement, custom storage, and a finish that matches the kitchen, it can feel like a natural part of the home rather than an add-on.
I am David Alan, President of Closets by David Alan in Pittsburgh, where we create tailored, high-end storage spaces with a white-glove design and installation experience. My work helping homeowners add walk in pantry to kitchen layouts focuses on refined millwork, practical organization, and details that make daily life easier.
How to Plan Layouts and Add Walk in Pantry to Kitchen Footprints
Planning a walk-in pantry begins with space planning and kitchen ergonomics. A pantry should make cooking easier, not create bottlenecks in your daily routine. Houzz features over 57,000 photos of walk-in pantry ideas, reflecting how central these spaces have become to modern home design. However, an inspiring photo is only helpful if the floor plan functions well in everyday life.
The layout of your pantry must respect the kitchen work triangle: the natural pathway connecting the refrigerator, cooktop, and primary sink. Place the pantry entrance near the food preparation and unloading zones. When you return home with groceries, you want a short path from the kitchen entryway or garage to unload dry staples directly onto shelves without weaving through the main cooking area.
Similarly, when preparing meals, grabbing olive oil, spices, or canned ingredients should take only a few steps. As outlined in professional architectural planning guidelines, keeping continuous counter runs between your main prep zone and primary appliances prevents unnecessary steps and broken sightlines.
Before settling on a floor plan, evaluate your structural boundaries. Determine whether surrounding partitions are load-bearing walls. Removing or recessing into a non-load-bearing partition is straightforward, while modifying a load-bearing wall requires engineered structural headers and proper support posts.
Evaluating Floor Space and NKBA Clearance Standards
A functional walk-in pantry balances shelf depth with floor space. According to the National Kitchen and Bath Association (NKBA), a dedicated single-user walk-in pantry requires a minimum footprint of 5 by 5 feet (25 square feet) to maintain comfortable turning radius and accessibility.
Key clearances to maintain include:
- Single-User Walkways: Maintain a minimum 36-inch clear aisle between opposing shelves or between a shelf edge and a finished wall.
- Dual-Cook Walkways: If multiple family members access the pantry simultaneously, expand the aisle to 42 or 48 inches.
- Vertical Clearance: Take full advantage of high ceilings (such as standard 9-foot or 10-foot heights) by running upper storage toward the ceiling for seasonal items.
- Door Clearances: Provide adequate clearance outside the pantry door swing so opening it never interferes with adjacent base cabinet drawers or kitchen island seating.
Forcing a walk-in layout into a room smaller than 5 by 5 feet often results in tight corners and hard-to-reach shelves. In tight spaces, a reach-in pantry cabinet system is usually the more functional option.
Best Locations to Add Walk in Pantry to Kitchen Floor Plans
Finding square footage for a walk-in pantry does not always require expanding your home's exterior footprint. Often, the necessary space already exists within your floor plan.
Look for these conversion opportunities:
- Adjacent Hallway or Coat Closets: A standard hallway, under-stair closet, or entry closet sharing a wall with the kitchen can often be opened from the kitchen side.
- Unused Kitchen Corners: Framing out an L-shaped diagonal corner can transform dead space into an accessible walk-in pantry.
- Mudroom or Laundry Room Nooks: Reallocating square footage from an oversized laundry room or utility area creates an organized transition zone between the garage and the kitchen.
- Reclaiming Shallow Built-In Niches: Many older homes feature shallow alcoves, obsolete built-ins, or utility chases. Homeowners often discover hidden floor space by reclaiming built-in wall cavities, removing inefficient decorative dividers to build a deeper pantry.
At Closets by David Alan, our approach to designing custom spaces centers on uncovering these hidden architectural opportunities, ensuring every square inch serves a clear functional purpose.
Step-by-Step Design: Shelving, Appliances, and Workstations
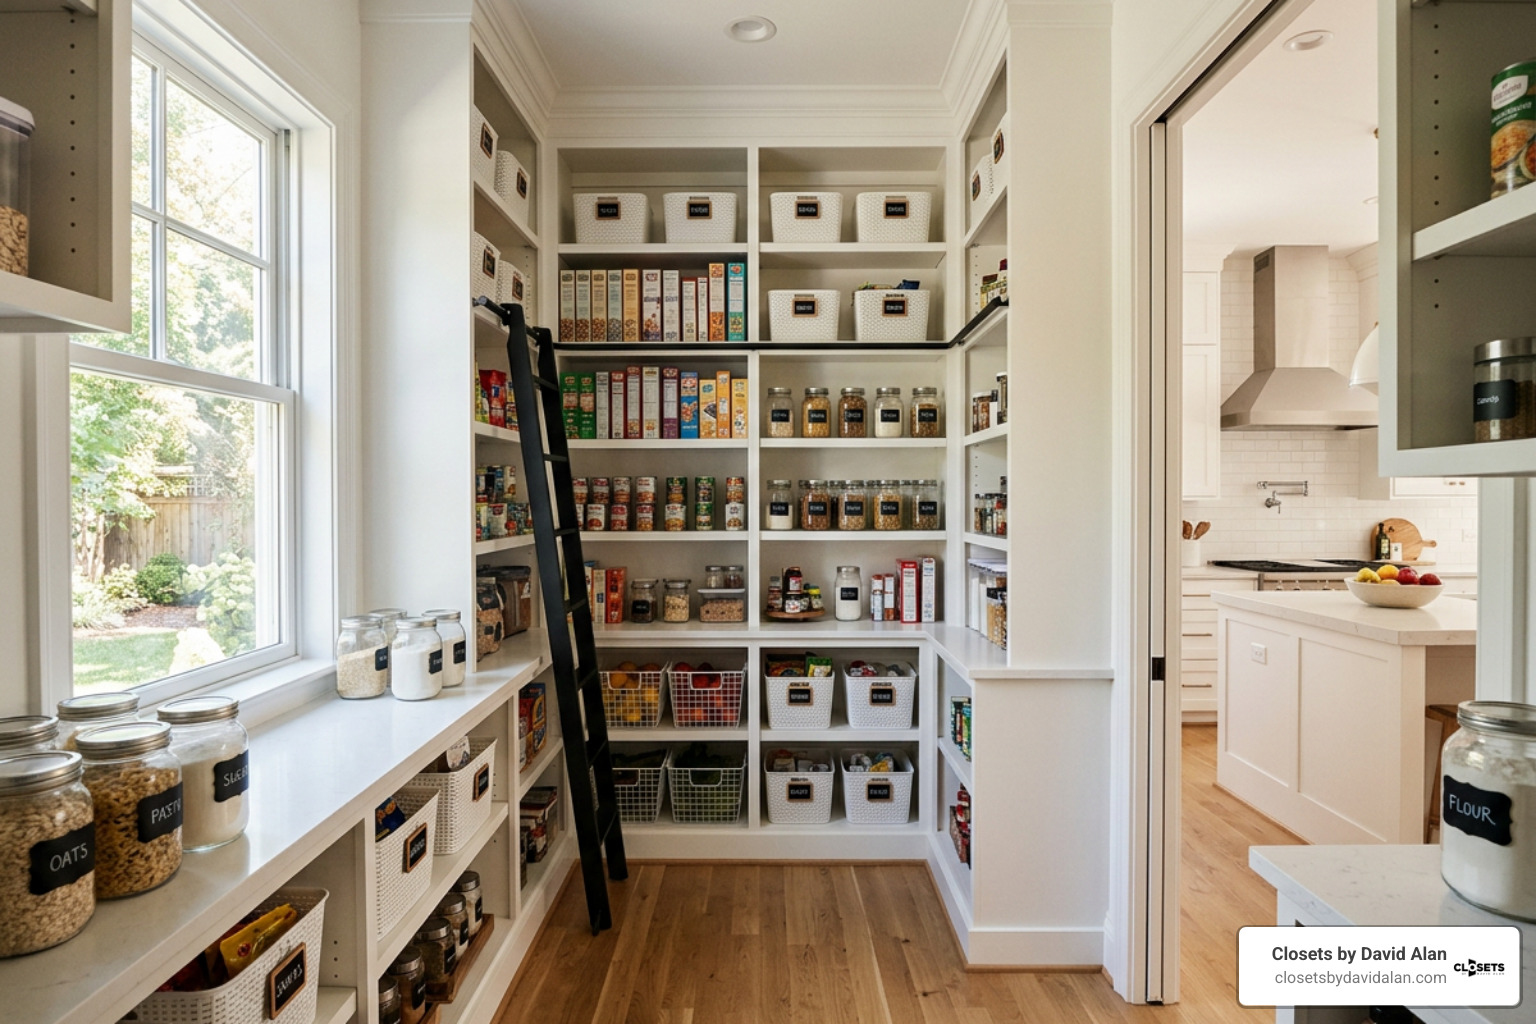
Once the footprint is established, focus on the interior architecture. A high-performing walk-in pantry combines dry-goods storage, vertical space utilization, small appliance organization, and functional prep surfaces.
Custom Shelving Configurations and Vertical Spacing
Proper shelf depth is essential for organized storage. Shelves that are too deep cause dry goods to get lost in the back, leading to forgotten ingredients and unnecessary food waste.
Adopt a tiered shelving strategy:
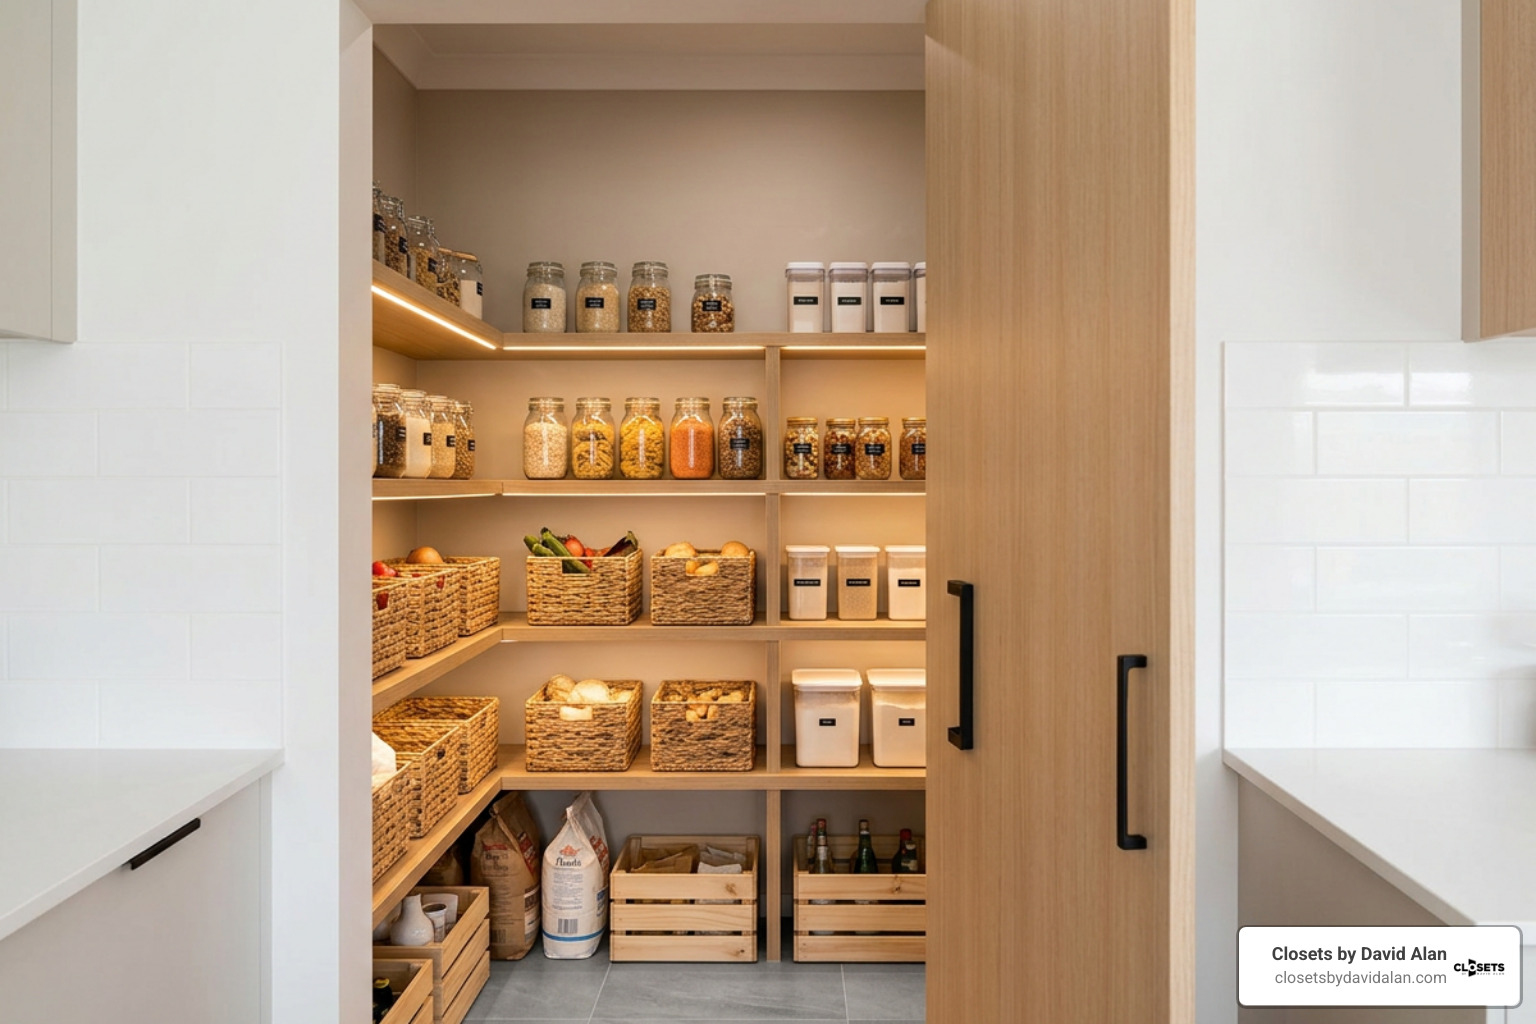
- Upper Shelves (10 to 12 inches deep): Ideal for eye-level canned goods, spices, pasta boxes, jars, and everyday baking staples. Items stay visible in single or double rows.
- Lower Shelves and Base Cubbies (14 to 18 inches deep): Built to support bulk warehouse packs, oversized stockpots, beverage cases, and heavy mixing bowls.
- Vertical Shelf Adjustability: Incorporate standard 32mm hole systems to adjust shelf heights as your container sizes change.
- Container-First Spacing:
Plan vertical increments around real pantry items:
- 9 to 10 inches for standard canned goods and condiments.
- 14 inches for cereal boxes, tall oil canisters, and decanted dry-good dispensers.
- 16 to 20 inches for bottom floor cubbies holding bulk bins.
- Corner Transitions: Use continuous L-shaped corner shelving rather than broken right-angle joints to avoid dead, inaccessible space.
Investing in a tailored custom kitchen pantry ensures your shelving supports heavy loads (50 to 75 pounds per linear shelf) using structural wall anchors and solid millwork that will not sag over time.
Integrating Appliance Prep Counters and Electrical Outlets
An interior work surface helps clear everyday countertop clutter from your primary kitchen. Incorporating a dedicated 36-inch standard counter-height prep station transforms a standard food closet into a hard-working workspace.
Consider these electrical and surface guidelines:
- Countertop Materials: Durable butcher block sealed with food-safe finishes or non-porous quartz countertops provide dependable surfaces for coffee grinders, blenders, and stand mixers.
- Clearance Ergonomics: Maintain 18 to 19 inches of vertical clearance between the countertop and the lowest upper shelf to fit standard countertop appliances.
- Dedicated Electrical Circuits: Install a dedicated 20-amp electrical circuit to safely power high-draw appliances like microwaves, air fryers, and espresso machines.
- Small Appliance Garages: Conceal cords and frequently used appliances with pocket doors or lift-up tambour doors to keep open surfaces uncluttered.
Walk-In Pantry vs. Built-In Pantry Cabinets
When deciding how to allocate your kitchen footprint, compare a dedicated walk-in room against a wall of floor-to-ceiling built-in pantry cabinets.
| Feature | Walk-In Pantry Room | Built-In Tall Pantry Cabinets |
|---|---|---|
| Minimum Space Required | 25 sq ft (5' x 5' footprint) | 6 to 12 sq ft (15" to 24" cabinet depth) |
| Storage Capacity | High volume; accommodates bulk items and crates | Medium-to-high volume; optimized for single-depth items |
| Appliance Integration | Full prep counters, microwaves, and coffee bars | Small hidden pull-outs or compact appliance garages |
| Aisle Clearance Impact | Dedicated interior walkway required | Requires external aisle clearance for swinging doors |
| Visual Connection | Completely concealed behind closed or pocket doors | Integrated into the primary kitchen cabinetry design |
| Organization Style | Open multi-tier shelving, baskets, and deep bins | Full-extension slide-out drawers and door racks |
Capacity, Accessibility, and Workflow Trade-Offs
A walk-in pantry provides unmatched storage volume for larger households and those who buy in bulk. It keeps small appliances, secondary prep messes, and dry food hidden behind closed doors. This is particularly valuable in open-concept floor plans where the kitchen is visible from living areas.
However, tall pantry cabinets offer exceptional accessibility in narrower spaces. Because full-extension pull-out drawers bring pantry items directly to you, there is no need to step inside an enclosed room.
If your kitchen layout cannot accommodate a 36-inch walkway inside a 5x5-foot footprint without sacrificing primary cooking zones, built-in tall pantry cabinets are often the more efficient choice.
Walk-In Pantry Budgeting and Remodeling Costs
Planning a walk-in pantry renovation requires understanding the structural, electrical, and finish components that shape overall project scope. For broader context on planning, explore this 2026 walk-in pantry buildout cost guide.
Key Cost Factors When You Add Walk in Pantry to Kitchen Spaces
Several design decisions determine the scope and investment level of your pantry build:
- New Construction vs. Closet Conversion: Framing new walls, hanging drywall, and adding door jambs requires more labor and structural work than retrofitting an existing closet.
- Cabinetry and Shelving Systems: Custom architectural millwork, painted hardwoods, and full-extension solid dovetailed drawer boxes offer superior durability and aesthetics compared to basic wire or vinyl-wrapped shelving.
- Countertop Fabrication: Adding quartz, granite, or sealed solid hardwood worktops introduces material and professional fabrication requirements.
- Electrical and Mechanical Rough-Ins: Adding dedicated circuits, GFCI outlets, motion-sensor LED puck lights, and ventilation involves professional trade coordination.
- Architectural Doors and Hardware: Matching exterior pantry doors to your kitchen cabinetry—whether with integrated cabinet panels, pocket doors, or frosted French doors—creates a unified, intentional look.
Frequently Asked Questions About Kitchen Walk-In Pantries
What is the minimum size needed for a functional walk-in pantry?
A functional walk-in pantry requires a minimum footprint of 5 feet by 5 feet (25 square feet) . This provides room for 12-inch shelves along the walls while preserving the recommended 36-inch clear walkway for one person to comfortably stand, turn, and bend down. If you want 24-inch deep base cabinets or an appliance prep counter, expand the footprint to at least 6 feet by 5 feet to prevent a cramped workspace.
Do I need a building permit to add a walk-in pantry?
Yes, in most jurisdictions, adding a walk-in pantry requires permits if your project involves framing new interior walls, altering load-bearing structures, or running new electrical circuits. Adding dedicated 20-amp appliance circuits and GFCI outlets requires code-compliant rough-ins and formal inspections. Always verify local building codes in your municipality before starting structural demolition.
How do you prevent heat and humidity buildup in an enclosed pantry?
To keep dry foods fresh, dry storage areas should maintain temperatures between 50°F and 70°F . In an enclosed pantry with running appliances (such as a microwave or espresso machine), heat and humidity can accumulate quickly.
Prevent this by using cool 2700K to 3000K LED lighting rather than heat-generating incandescent bulbs. Additionally, leave adequate ventilation gaps around heat-producing appliances, install louvered or undercut pantry doors for passive airflow, or add a quiet, sensor-activated exhaust fan.
Conclusion
Adding a walk-in pantry to your kitchen is one of the most rewarding home investments you can make. It transforms daily cooking by removing clutter from your countertops, streamlining grocery organization, and giving every appliance and dry staple a dedicated home.
Whether you convert an adjacent closet, claim space from an oversized laundry room, or frame a new corner layout, prioritizing proper clearances, adjustable shelving, and layered lighting will ensure your pantry remains organized and enjoyable to use for years to come.
At Closets by David Alan, we believe every storage space should blend refined aesthetics with practical functionality. Explore our luxury walk-in closets and bespoke storage solutions to see how our custom millwork, detailed 3D design process, and white-glove service can elevate your home.